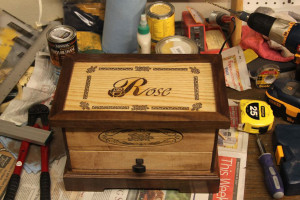
Tag Archives: laser

Brownie-Bite Display

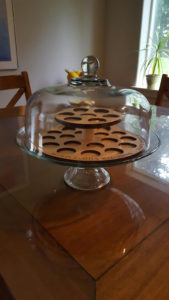
Mom came to me with a small sketch and asked if there was a way to make a display for brownie bite cupcakes for her glass cake display.  Yeah, there is.

Laser-cut ply glued together in layered sections, with a dowel socketed in laser-cut holes.  A little family flourish around the lower edge, a coat of water-based poly, and it looks pretty good.

Jewelry Moose

IMG_5205

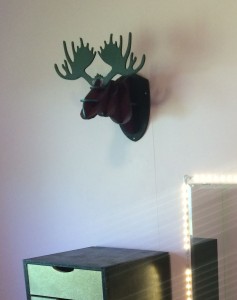
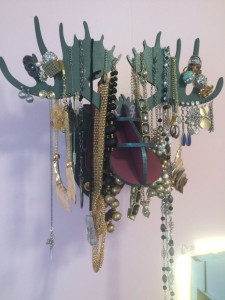
For Christmas a while ago, I was trolling around online for gift ideas and stumbled across plans for a moose head jewelry holder over on thingverse.  I figured this would be a novel display piece for my friend Kerry, who at the time was using a line of cup-hooks to hold her necklaces.

IMG_5212Cut it out on the laser cutter, gave it an appropriately novel paint job, and gifted it away.  After she settled into her new place, she hung it up, and now it’s the most blinged-out moose that’s ever been.

It even has a name (courtesy of Peter):  Bulltwinkle.

Cutting Board

IMG_1276
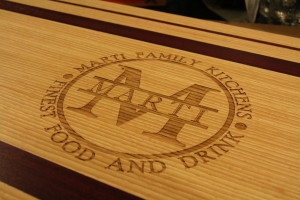
fig 1: The finished product

I made an end-grain cutting board for my brother a couple years ago, and I decided to make another board this year for my uncle.  But instead of end-grain, I thought I’d keep it a little simpler and just go with a normal edge-grain cutting board.

I had a Hickory board that I picked out a year or two ago that I was going to turn into bow staves, so it had straight grain and was knot free.  I also had a Purple Heart board kicking around, so I thought I’d add in a few strips of that to give it a nice contrast.

IMG_1181
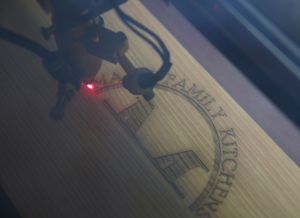
fig 2: Dynamite with a laser beam

Got the cutting board glued up and planed, then hauled it over to Schenk’s for a trip through the laser cutter.

Brought it home, then started adding coats of plain old food-grade mineral oil.  Rubbed on a coat, let it sit for a few hours, then added another coat.

After a few days of adding a coat of oil every so often, I wrapped it up and gave it away as a gift.  With the monogram on one side, it can be used as a serving tray, and food or other items can be cut on the backside.

Lessons Learned: Edge-grain cutting boards are much easier than end-grain, and I not counting glue-up time, I can knock one out in a couple hours.  I just need to expand my repertoire of things to laser-engrave into them.

Lisa’s Geological Specimen Box

DSCN3895

When Christmastime was rolling around, I had some gifts (almost all of them, I guess) that would require access to Schenk’s laser cutter.  But then he was called out of town at the last minute.  Oh no!  Fortunately, his wife was kind enough to allow me to stop by and finish my gifts in time for Christmas.  When I was walking out the door with my arms loaded with gift parts, I told her that I would design her something worthwhile.

The BPAL Box for Isaac’s wife Cyl.  The Needlepoint Box for Pete’s Wife Sarah.  I decided to continue the tradition of box-making tailored to the recipients specific hobby.  Something that makes them unique.  For their wedding centerpieces last year, Lisa deployed some of her finest mineralogical specimens to support the rustic, natural theme of their reception.  But visiting their home a few months later, I saw some of them in a bucket.  That just won’t do.
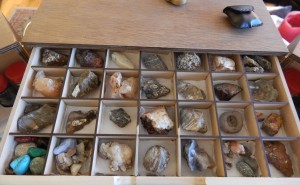
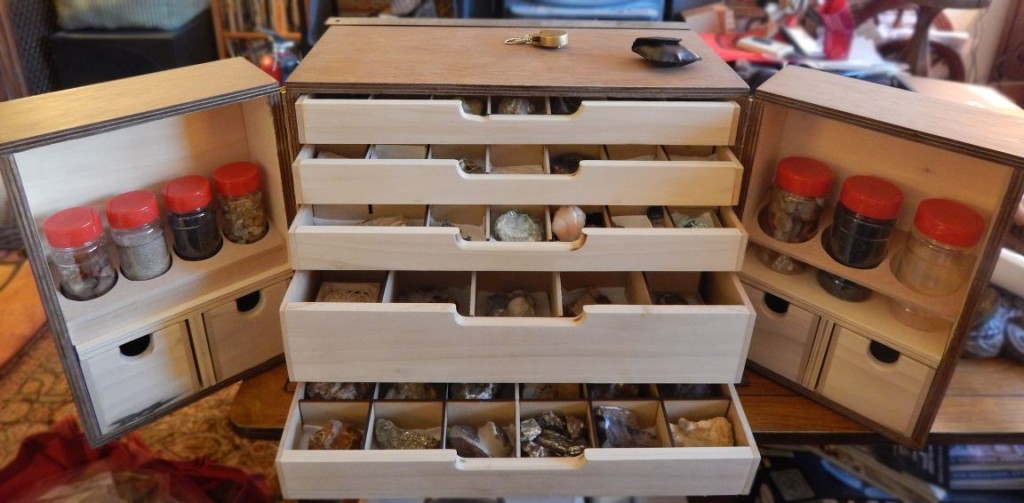
DSCN3900I doodled a couple ideas for what I wanted the box to look like.  I knew I wanted shallow sample trays, so each specimen would be easily visible and accessible.  I wanted doors on the front so that the trays wouldn’t slide out during transport.  If the doors were deep enough, I could make space for smaller containers for sands, soils, and agates, along with specimen maintenance tools like brushes and loupes.

Withe dimensions roughed out on paper, I translated the design into Sketchup so that I could get some hard numbers.

I didn’t want visible screws, so this box marked my foray into plate-joinery.  I received a plate joiner as a gift last year, but haven’t had an opportunity to use it.  The box was going to have rocks in it, and I didn’t want it coming apart when moving it.
DSCN3904The carcase is made of 1/2″ sandeply joined with biscuits, and the trays are Poplar fronts with 1/4″ MDF joined using my 17-gauge pin nailer.  After assembling the third tray, I finally got the idea that the MDF wouldn’t split if I pinned it closer to the middle of the boards.  Better late than never.  I didn’t trust myself notching all the tray dividers on the table saw, so it was a perfect job for the laser cutter.

Each tray got a wipe-down of paste wax on the bottoms and sides for a smooth ride in and out of the box.  The drawers fit so snugly that they give a little owl “hoot” when pushing them back in; the escaping air has to pass over the tops of the sample compartments, in effect creating a type of whistle.

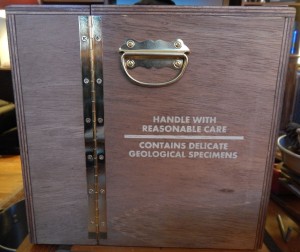
Brass hardware keeps everything together.  Even though I wanted to use nickel hardware, I was kind of forced to use brass hardware since I couldn’t find the handles I wanted in nickel.  Lisa’s keeps the collection secure with an antique brass lock.
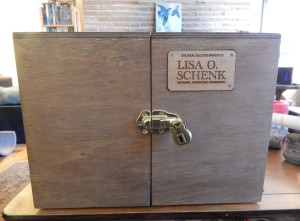
DSCN3903The box was finished with Dark Walnut stain and two layers of semi-gloss poly.  Before applying the poly, I cut out stencils on the Cameo for each side of the box and applied a quick spray of rattlecan white.

For maximum personalization, I created a name plate so that there would be no question or confusion as to who owned the box, and what was inside.

Lessons Learned

When working with plywood, if I’m making something nice as a gift, I need to either apply edge banding to the exposed plywood edge, or paint the whole box.  I finish the plywood surface because I wanted to give a ‘finished wood’ look, but the exposed ply edges really take away from the whole aesthetic.

Also, I got to use my plate joiner for a practical project, which was fairly easy and fun.
Mackie’s Pendant

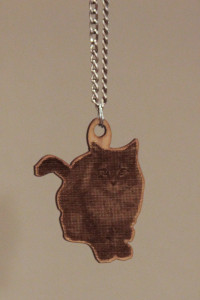
Decided to memorialize the fall of a fiend’s fallen comrade with a small piece of jewelry.  Up until now, everything I have lased has been purely vector format, so this marks my first foray into grey-scale imagery.

IMG_2710MSRaynsford had a series of articles where he was experimenting with reproducing grey-scale using a combination of power setting adjustments and halftone conversions for the photos.

I just went halftone, and adjusted the power, speed, and focusing distance until I was getting good blacks on the wood.

I went with MDF because it’s a uniform composition of wood; there’s no grain that will take different amounts of burning.  Plus the etching blows out the surface of the wood, so there’s no use in wasting wood with grain to it.

The final cut pass was generated by expanding the path around the photo, and came out with sharper corners than I anticipated.  I would have rounded them down with sandpaper, but then the parts I sanded down would be light exposed MDF contrasting with the blackened MDF generated after the cut pass.

Grabbed a fine silver (looking) chain from Michael’s, and it made for a fine memorial gift.

Lessons Learned
How to etch in grey-scale with a laser.

Christmas Boxes for Aunt Gloria

At thanksgiving, I drew my Aunt Gloria’s name out of the bowl for our family’s secret-santa.  Decided on making a pair of small boxes.

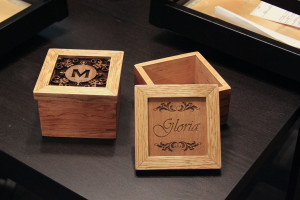
IMG_2705The bodies of the boxes are miter-joined Maple with Oak keys on the side edges.  The lids are a miter-joined Oak frame with 1/8″ laser-cut plywood set in a slot in the frame.

The box on the left is laser-cut all the way through.  It features my aunt and uncle’s name around a monogrammed initial, and is intended to be a potpourri box (I included a bag of potpourri to drive that point home).  The box on the right is etched with just my aunt’s name, and is intended to be just a keepsake or jewelry box.

Lessons Learned:
I should have used a darker contrasting wood for the keys, like Walnut or Purple Heart.  I was hoping the Oak wood would absorb more of the darker stain.  Also, some of the filigree work on the potpourri lid is alarmingly thin.  A couple small pieces broke off, and I had to break off the mirrored pieces to retain a symmetrical look.  The filigrees look like they just touch the lid frame, but they extend to a sturdy rectangular piece that runs around the entire inside of the slot it fits in, so the majority of it is surprisingly sturdy.

Skyrim Coasters

My friend Nate loves Skyrim.  I remember him excitedly showing me the trailer for it months before it came out, and he played the hell out of it after it came out.  Before X-mas time, I trolled the net for some Skyrim gift ideas, and came across a set of Skyrim-themed coasters.  That would make a great gift.

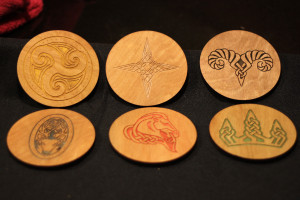
IMG_3240Each coaster is 3mm ply with a city logo from six of the nine major cities laser-etched into the surface.  I cut circles from a thin self-adhesive cork sheet and stuck them to the bottoms.  I applied wipe-on polyurethane to the surface (making sure not to get any down into the logo area), then washed the logos with an assortment of thinned acrylic paint; the excess acrylic was then easily wiped off the poly’d surface of the coaster.

IMG_3243
fig 2: example of foreground depth-of-field misjudgement

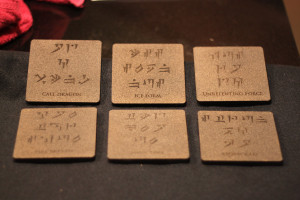
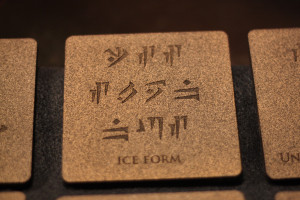
I didn’t think six tiny coasters would make an impressive gift, so I decided to double-down and create another six coasters.  In Skyrim, spells are learned by finding ancient engravings etched in stone.  I wanted to make six more coasters to look like stone tablets engraved with the Dovahkiin translations of six different spells.

Each coaster is laser engraved in 3mm ply, then sprayed with a stone-textured paint.  I did the same thing I did with the city-emblem coasters, only it was very difficult this time because it was hard to wipe away the black acrylic paint from the very rough texture of the coaster.  They still turned out pretty well.  Self-adhesive cork applied to the bottoms protects the surfaces upon which they sit.

IMG_3247

Dalek-Human Hybrid Gun

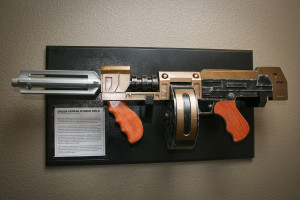
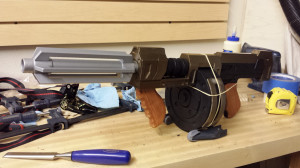
IMG_1842Once upon a time, my friend Pete said, “You know… I don’t really give a damn about props, but if I could have one prop, it would be that Dalek machine gun from that one episode of Dr. Who.”  At least, I think that’s what he said.

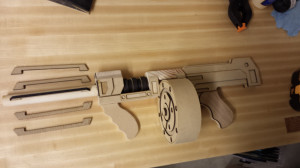
20130904_042223I managed to find plans online that a clever gentleman created so that he could machine the parts from layers of MDF on his CNC machine.  I converted them into .dxf format so that I could lase them out of thinner layers of MDF and accomplish the same end.  Got them cut out on the laser, except for the pieces that were 1/2″ thick (too thick for speedy cutting on the laser).  I used the laser to quickly draw the pattern on the surface of the wood, then cut it out on the bandsaw.

Bending the MDF around the drum magazine was pretty hair-raising.  I’m just going to throw that out there.

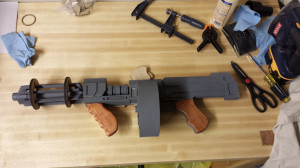
20130905_034625Applied a trusty coat of battleship-gray to the whole thing, except for the grips.  The rear grip turned out really, really well. It was laser-cut birch ply which stained well and looked like actual grips.  The front grip, however, was made from cheap pine, had a poor grain pattern, and didn’t take stain well at all.

20130907_174244Applied some metallic rattlecan silver and gold for accents over the top of semi-gloss black.  Covered the whole thing with a coat of matte sealer (which would start to flake off weeks later).

Lookout the Lamp

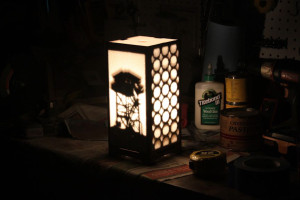
IMG_1265My brother is the outdoorsy type, and for a few summers he volunteered at fire lookouts here in Oregon.

I found a photo online of a fire lookout that was contrasted nicely against a plain blue sky.  Then I used Illustrator to convert it into a vector image.  Spent some time weeding out the ‘islands’ and the super-narrow parts until I arrived at the finished product, then lased it out of thin plywood.

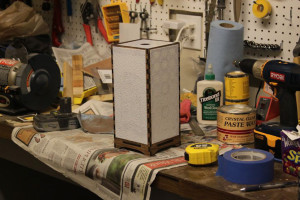
IMG_1268Usually when  making lamps, I put the diffusion material on the inside.  However, because of the thin, delicate strands of wood holding up the tower, I decided to put diffused plastic on the outside of the lamp to act as a protective ‘shell’.

Like almost all lamps I make, this is outfitted with the guts from a cheap Ikea glass lamp, and a CFL bulb.

Lessons Learned
Even though I used thin plywood and it’s up against the plastic, the silhouette is thick enough that it casts a weird ‘halo’ shadow when the lamp is lit.  I also cut my brother’s name out in the back so that it would project on the wall behind the lamp, but that part doesn’t work.  It just lights up the wall behind the lamp.

Mom’s Keepsake Box

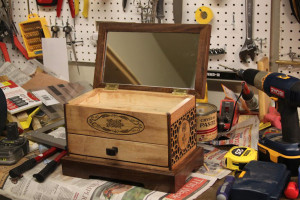
IMG_1282Welp, here it is.  The reason I started woodworking in general.  For Christmas, I wanted to make mom something, so I decided on a jewelry box.  I didn’t like any of the plans I found online, so I decided just to make one from scratch.  Doodled up some blueprints at work, then got down to business.

The box is Cherry with Walnut lid, base, and edge accents.  I routed a very wide groove along the sides to accommodate laser-cut panels glued to the sides.  The oval emblem on the front had two cut passes; the first pass was to cut out the emblem, and the second pass cut out an expanded oval that I could use as a template for the guide bushings on my router.

IMG_1281The lid is a Walnut frame surrounding thin Oak ply with a Rosewood veneer inlay.  I cut out and glued a mirror pane onto the underside of the lid, and added a chain to keep the lid from flopping back too far.

I also lined the inside of the box with navy blue velvet, which I did after I took the picture at the top of the post.

Lessons Learned
There’s a lot of wasted space under the drawer, and the box sits taller than I’d like.  I should have made the Walnut part of the base shorter, and eliminated the gap between the bottom of the drawer and the walnut base.  Maybe making the box wider or deeper would make it feel not so ‘tall’.

I picked up the least-intrusive handle I could find, but in hindsight I probably should have used a dresser-style hanging pull that would have sat more flush with the front of the box.