Tag Archives: xmas

Mom’s Terraced Planters

As always, racked my brain on what to get/make mom for Christmas.  I eventually settled on a ladder-style planter for her to grow herbs or smaller flowers, but during my research into the different types of planters, I came across a series of terrace-style planters.
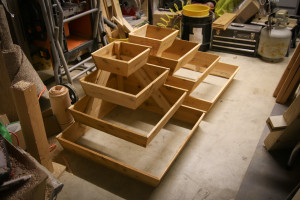
IMG_1358 I settled on making two planters that had a right-angle corner.  That way the planters could either be placed in two separate corners of the garden, or the planters could be secured together side-by-side, to make one larger terraced planter.  I didn’t know what mom’s vision for her garden had in store, so I thought versatility would be appreciated.
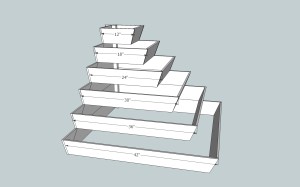
Ziggurat Planter - CornerDrew up some plans in Sketchup, and then found a calculator online to help me get the compound angles I’d need to dial into my miter saw.

Cut the planter sides out of normal cedar fence pickets that were found at the local big-box store, and reinforced the structure with a 2×2 cedar ‘spine’ at the right-angle corner.  I attempted to screw everything together, but the compound miter angles made it fairly difficult; I wound up putting long nails into my pin nailer, and just nailed the heck out of it.

My initial design had two more terraces, but before I cut the boards I ran out to the car with the tape measure.  Two of the four terrace planters would fit in my car for transport on Christmas day.  Any more terraces, and I would have to do assembly there on Christmas day.

Lessons Learned: Compound miters are really easy if you keep them to just one corner.  Also, if the cedar fence pickets were a little thicker, I probably wound have tried to use some kind of spline to help keep everything together.

I didn’t really think about it until the planters were done, but there’s a lot of wasted space in this style of planter that needs to be packed with fill dirt.  I feel kind of bad that in giving my mom the planters for Christmas, I also inadvertently got my old man an extra chore.
Cutting Board

IMG_1276
fig 1: The finished product

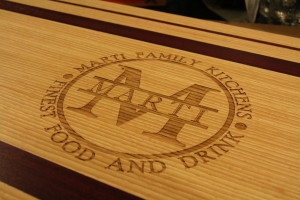
I made an end-grain cutting board for my brother a couple years ago, and I decided to make another board this year for my uncle.  But instead of end-grain, I thought I’d keep it a little simpler and just go with a normal edge-grain cutting board.

I had a Hickory board that I picked out a year or two ago that I was going to turn into bow staves, so it had straight grain and was knot free.  I also had a Purple Heart board kicking around, so I thought I’d add in a few strips of that to give it a nice contrast.

IMG_1181
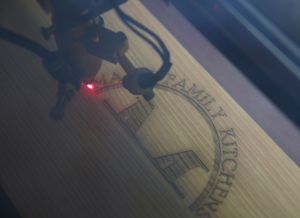
fig 2: Dynamite with a laser beam

Got the cutting board glued up and planed, then hauled it over to Schenk’s for a trip through the laser cutter.

Brought it home, then started adding coats of plain old food-grade mineral oil.  Rubbed on a coat, let it sit for a few hours, then added another coat.

After a few days of adding a coat of oil every so often, I wrapped it up and gave it away as a gift.  With the monogram on one side, it can be used as a serving tray, and food or other items can be cut on the backside.

Lessons Learned: Edge-grain cutting boards are much easier than end-grain, and I not counting glue-up time, I can knock one out in a couple hours.  I just need to expand my repertoire of things to laser-engrave into them.

A Cork Box for Corks

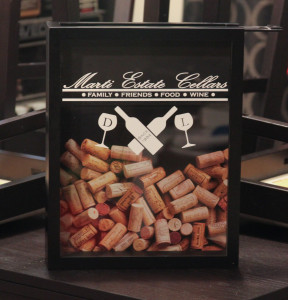
I have an Aunt and Uncle that like wine and preparing gourmet food, and when I was at their place for Thanksgiving I noticed bags of corks.  Before Christmas, I told them that if they brought some corks for me, I would make it worth their while.

IMG_2709I picked up a plain black top-loading shadowbox at Michaels, as it was easier to just pay for one outright as opposed to having to building one from scratch (mostly didn’t want to deal with the glass cutting; plus, they’re really affordable).  I designed a logo that featured their name and their wedding year, along with their initials on the glasses.

Lessons Learned
The original plan was to cut the artwork out on the Cameo, then use some etching cream so the design would be etched in the glass.  However, I wasn’t thinking when I started weeding the contact paper and accidentally ‘inverted’ the design; the white parts of the logo would be clear, and all the parts around would be etched.  Eh, it’ll still work out.

I applied the cream, let it set for a pretty long time, then rinsed it off.  To my dismay, the etching was awful and splotchy.  I applied more cream to the bad parts, but to no avail.  I later learned that the cream isn’t good for etching large areas at once, as differences in the glass composition react to the cream differently.  The cream is much better used for stencil work.

Grabbed a new box (as I said, they’re affordable), and decided just to settle on using vinyl.  It looks pretty good, plus the white will contrast nicely over the corks when it starts to fill up.

Christmas Boxes for Aunt Gloria

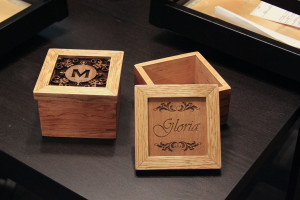
At thanksgiving, I drew my Aunt Gloria’s name out of the bowl for our family’s secret-santa.  Decided on making a pair of small boxes.

IMG_2705The bodies of the boxes are miter-joined Maple with Oak keys on the side edges.  The lids are a miter-joined Oak frame with 1/8″ laser-cut plywood set in a slot in the frame.

The box on the left is laser-cut all the way through.  It features my aunt and uncle’s name around a monogrammed initial, and is intended to be a potpourri box (I included a bag of potpourri to drive that point home).  The box on the right is etched with just my aunt’s name, and is intended to be just a keepsake or jewelry box.

Lessons Learned:
I should have used a darker contrasting wood for the keys, like Walnut or Purple Heart.  I was hoping the Oak wood would absorb more of the darker stain.  Also, some of the filigree work on the potpourri lid is alarmingly thin.  A couple small pieces broke off, and I had to break off the mirrored pieces to retain a symmetrical look.  The filigrees look like they just touch the lid frame, but they extend to a sturdy rectangular piece that runs around the entire inside of the slot it fits in, so the majority of it is surprisingly sturdy.

A Needlepoint Project Box

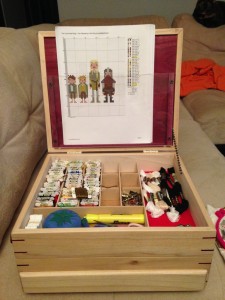
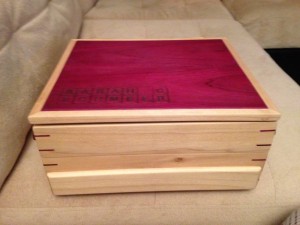
IMG_0304aMy friend Sarah enjoys knitting and needlepoint in her spare time.  I noticed she kept her thread cards in one container, her scissors and pins in her sewing kit, and hoops and projects elsewhere.  Wouldn’t it be nice, I thought, if she could keep all her needlepoint-related projects in one place?

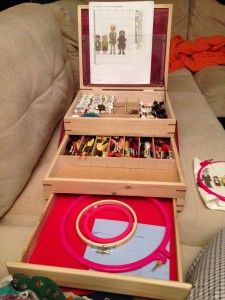
When I sketched up the plans, I knew that I wanted to have a partitioned area to keep the little plastic ‘cards’ of thread, an area for miscellaneous supplies (I think sewing enthusiasts call these items ‘notions’), an area for the ‘skeins’ of thread waiting to be put on the cards (not sure of the technical term for those), and an area for hoops when they aren’t in use.

IMG_0302At first, I was going to have just one box with a lift-out tray.  But I wanted to have three separate compartments.  I figured I would put a drawer in the bottom for large, infrequently-used items, the lift-out tray for frequently used items, and the main bottom compartment for moderately sized, moderately-used items.

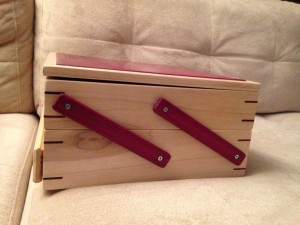
Instead of going with the lift-out tray, I decided to go with a fold-out style box, which I figured would be a bit more elegant and just as functional.

The box is made from Poplar with miter keys made from Purple Heart.  The lid is Purple Heart with a Poplar Frame.  I didn’t have a wide enough piece of Purple Heart for the lid, so I got to do my first book-matching rip on the table saw, and it turned out great.

IMG_0301To keep her mother-in-law (another needlepointer) from purloining the box, I burned Sarah’s full name deep into the lid using a Scrabble™ tile font I found online.  It’ll take a lot of belt sanding to get that name off the box.

IMG_0306a
Click to embiggen.

The lid is retained in an almost-upright position by a black chain on the right-hand side.  Since the lid is a little wider than 11.5″, I took a couple of scrap pieces of Purple Heart and used them as standoffs for a piece of Lexan.  That way, Sarah can keep needlepoint patterns with her projects.


Lessons Learned:In hindsight, I really wish I spent more time on getting the drawer flush with the front.  It looks fine head-on, but it sticks out a bit on the profile shot.

Skyrim Coasters

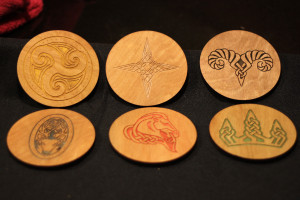
My friend Nate loves Skyrim.  I remember him excitedly showing me the trailer for it months before it came out, and he played the hell out of it after it came out.  Before X-mas time, I trolled the net for some Skyrim gift ideas, and came across a set of Skyrim-themed coasters.  That would make a great gift.

IMG_3240Each coaster is 3mm ply with a city logo from six of the nine major cities laser-etched into the surface.  I cut circles from a thin self-adhesive cork sheet and stuck them to the bottoms.  I applied wipe-on polyurethane to the surface (making sure not to get any down into the logo area), then washed the logos with an assortment of thinned acrylic paint; the excess acrylic was then easily wiped off the poly’d surface of the coaster.

IMG_3243
fig 2: example of foreground depth-of-field misjudgement

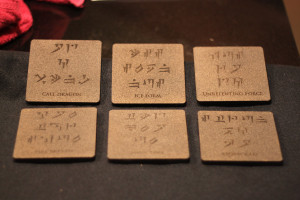
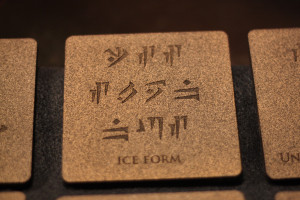
I didn’t think six tiny coasters would make an impressive gift, so I decided to double-down and create another six coasters.  In Skyrim, spells are learned by finding ancient engravings etched in stone.  I wanted to make six more coasters to look like stone tablets engraved with the Dovahkiin translations of six different spells.

Each coaster is laser engraved in 3mm ply, then sprayed with a stone-textured paint.  I did the same thing I did with the city-emblem coasters, only it was very difficult this time because it was hard to wipe away the black acrylic paint from the very rough texture of the coaster.  They still turned out pretty well.  Self-adhesive cork applied to the bottoms protects the surfaces upon which they sit.

IMG_3247

Lookout the Lamp

IMG_1265My brother is the outdoorsy type, and for a few summers he volunteered at fire lookouts here in Oregon.

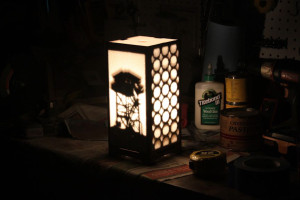
I found a photo online of a fire lookout that was contrasted nicely against a plain blue sky.  Then I used Illustrator to convert it into a vector image.  Spent some time weeding out the ‘islands’ and the super-narrow parts until I arrived at the finished product, then lased it out of thin plywood.

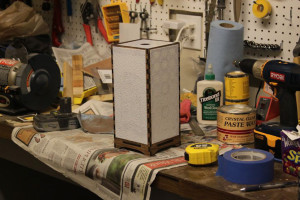
IMG_1268Usually when  making lamps, I put the diffusion material on the inside.  However, because of the thin, delicate strands of wood holding up the tower, I decided to put diffused plastic on the outside of the lamp to act as a protective ‘shell’.

Like almost all lamps I make, this is outfitted with the guts from a cheap Ikea glass lamp, and a CFL bulb.

Lessons Learned
Even though I used thin plywood and it’s up against the plastic, the silhouette is thick enough that it casts a weird ‘halo’ shadow when the lamp is lit.  I also cut my brother’s name out in the back so that it would project on the wall behind the lamp, but that part doesn’t work.  It just lights up the wall behind the lamp.

Mom’s Keepsake Box

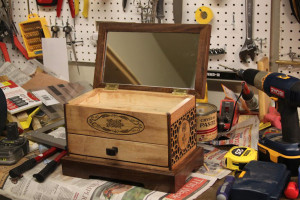
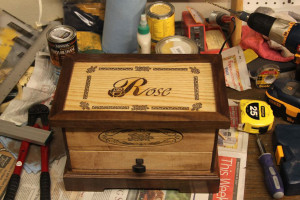
IMG_1282Welp, here it is.  The reason I started woodworking in general.  For Christmas, I wanted to make mom something, so I decided on a jewelry box.  I didn’t like any of the plans I found online, so I decided just to make one from scratch.  Doodled up some blueprints at work, then got down to business.

The box is Cherry with Walnut lid, base, and edge accents.  I routed a very wide groove along the sides to accommodate laser-cut panels glued to the sides.  The oval emblem on the front had two cut passes; the first pass was to cut out the emblem, and the second pass cut out an expanded oval that I could use as a template for the guide bushings on my router.

IMG_1281The lid is a Walnut frame surrounding thin Oak ply with a Rosewood veneer inlay.  I cut out and glued a mirror pane onto the underside of the lid, and added a chain to keep the lid from flopping back too far.

I also lined the inside of the box with navy blue velvet, which I did after I took the picture at the top of the post.

Lessons Learned
There’s a lot of wasted space under the drawer, and the box sits taller than I’d like.  I should have made the Walnut part of the base shorter, and eliminated the gap between the bottom of the drawer and the walnut base.  Maybe making the box wider or deeper would make it feel not so ‘tall’.

I picked up the least-intrusive handle I could find, but in hindsight I probably should have used a dresser-style hanging pull that would have sat more flush with the front of the box.